Send a text, voice and email notification
Composing communications for your audience
Connect Rocket distinguishes between visual messages (text and email) and audio messages (voice calls), allowing you to optimize each format for how your audience will actually consume it.
Visual Messages are crafted for mobile screens, where links and phone numbers can be easily tapped, saved, and shared.
Audio Messages are scripted specifically for phone delivery, ensuring critical information is spoken clearly and retained during high-stress situations.
This multi-channel approach improves message clarity and audience comprehension when it matters most.
Step 1
Sign into Connect Rocket. From the dashboard select Send a text, voice and email notification.

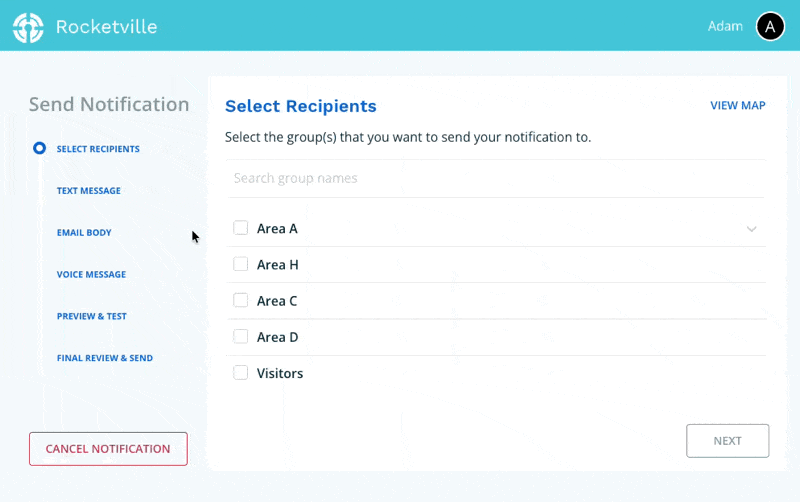
Step 2: Select Recipients
Select the group or groups you wish to notify by checking the box beside each group name. Selected groups will appear as tags in the search field. Once finished, click Next.
Tip: If you need help determining who should receive your notification, click View Map in the top-right corner to see recipient locations. You can also click the down arrow next to any group name (when available) to view descriptive details about that group.
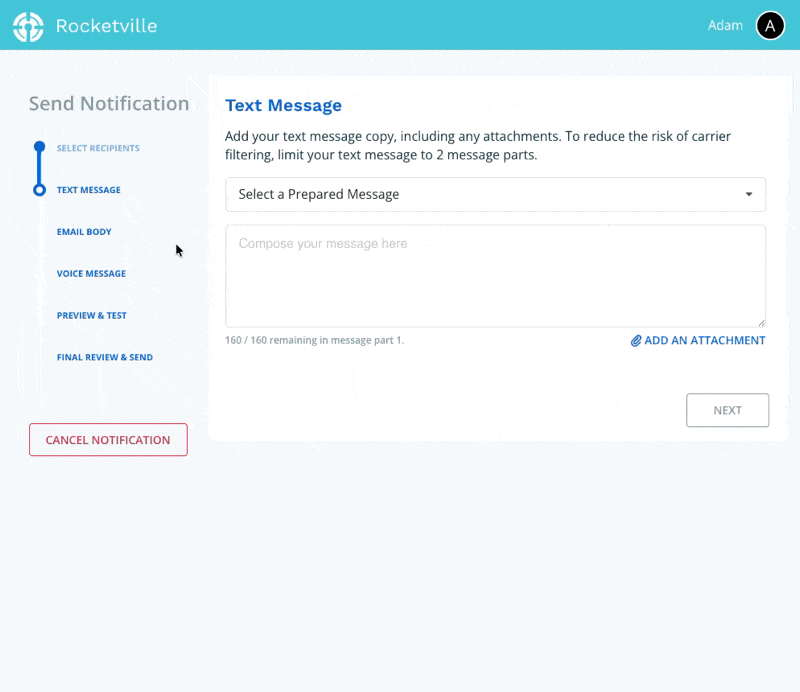
Step 3: Compose Your Text Message
Enter the content you want to deliver via text message. You have two options:
- Prepared Messages: Select a pre-approved message from the dropdown (if available on your account).
- Custom Message: Compose a new message from scratch.
Character Counts & Attachments
Below the message composition box, you'll see a character counter showing:
- Remaining characters in the current text message segment
- Total number of message parts to be sent
File Attachments: You may attach files in any format (videos, PDFs, images, etc.). Connect Rocket will automatically append a shortened URL to your outbound message. This is useful for sharing evacuation maps, shelter-in-place videos, or detailed incident reports.
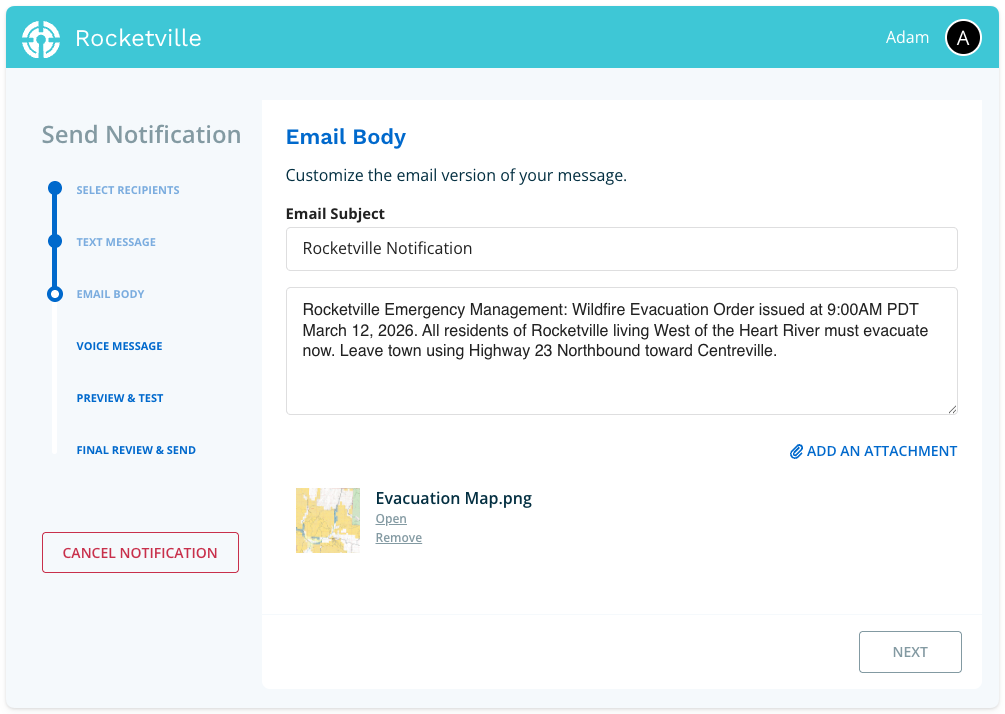
Step 4: Review Email Content
Your email body will be pre-populated with the text message content from Step 3. You may edit both the subject line and body as needed.
Click Next to proceed.
Account Setting Note: If your account currently shows a consolidated text and email composition step, but you prefer separate steps for each, go to Manage Account > Settings and enable Enable separate email body step.
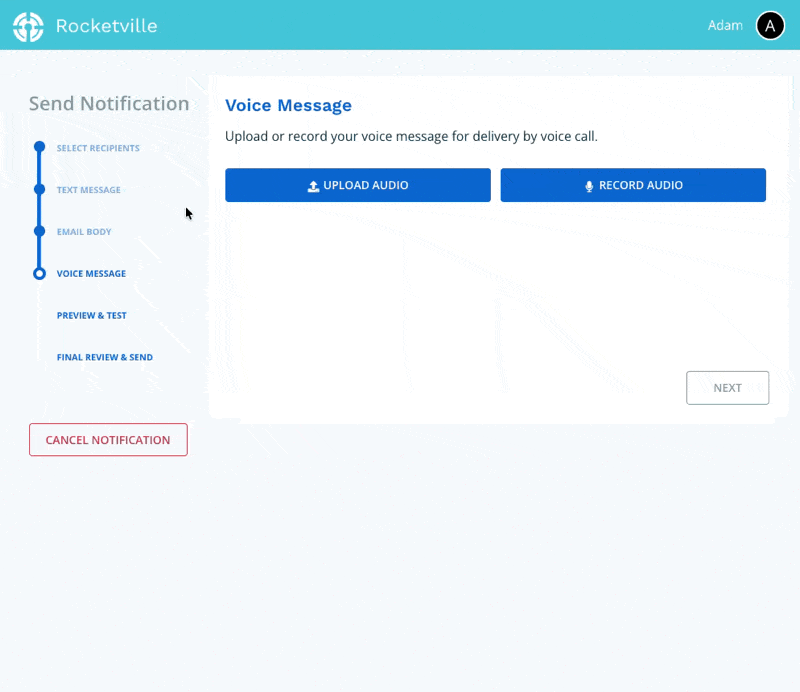
Step 5: Create Your Voice Message
There are two ways to add a voice message to your notification.
Generate Audio
Create a text-to-speech audio file using your script. Click Generate Audio and wait for the file to process (this typically takes a few seconds). A preview player will appear when ready. To modify the script, delete the current audio by clicking the trash icon next to the player, then edit your text and regenerate.
Upload Audio
Upload an audio file recorded on your computer or mobile device. Click Upload Audio, select your file, and wait for processing. A preview player will load once complete. Supported formats include any standard audio file (Connect Rocket will convert your file to MP3 for delivery). Delete and re-upload using the trash icon if needed.
Record Audio
Record directly through Connect Rocket. Click Record Audio, enter the phone number where you can be reached, and click Call me. The system will call you and guide you through recording and saving your message. Once saved, a preview player will load in your browser. Delete and re-record using the trash icon if you are unsatisfied with the result.
When finished, click Next.
Supported audio file formats.
You can upload any audio file format to Connect Rocket. We'll convert your file to .mp3 for delivery.
Step 6: Test Your Notification
Verify that your delivery details are correct and review all message content (text, email, and voice).
To test, enter a phone number and email address in the green test block at the top of the page, then click Send Test. The system will deliver your notification to these test addresses.
If you need to make changes, click the Edit links on the right side of the page. When satisfied with your testing, click Next.
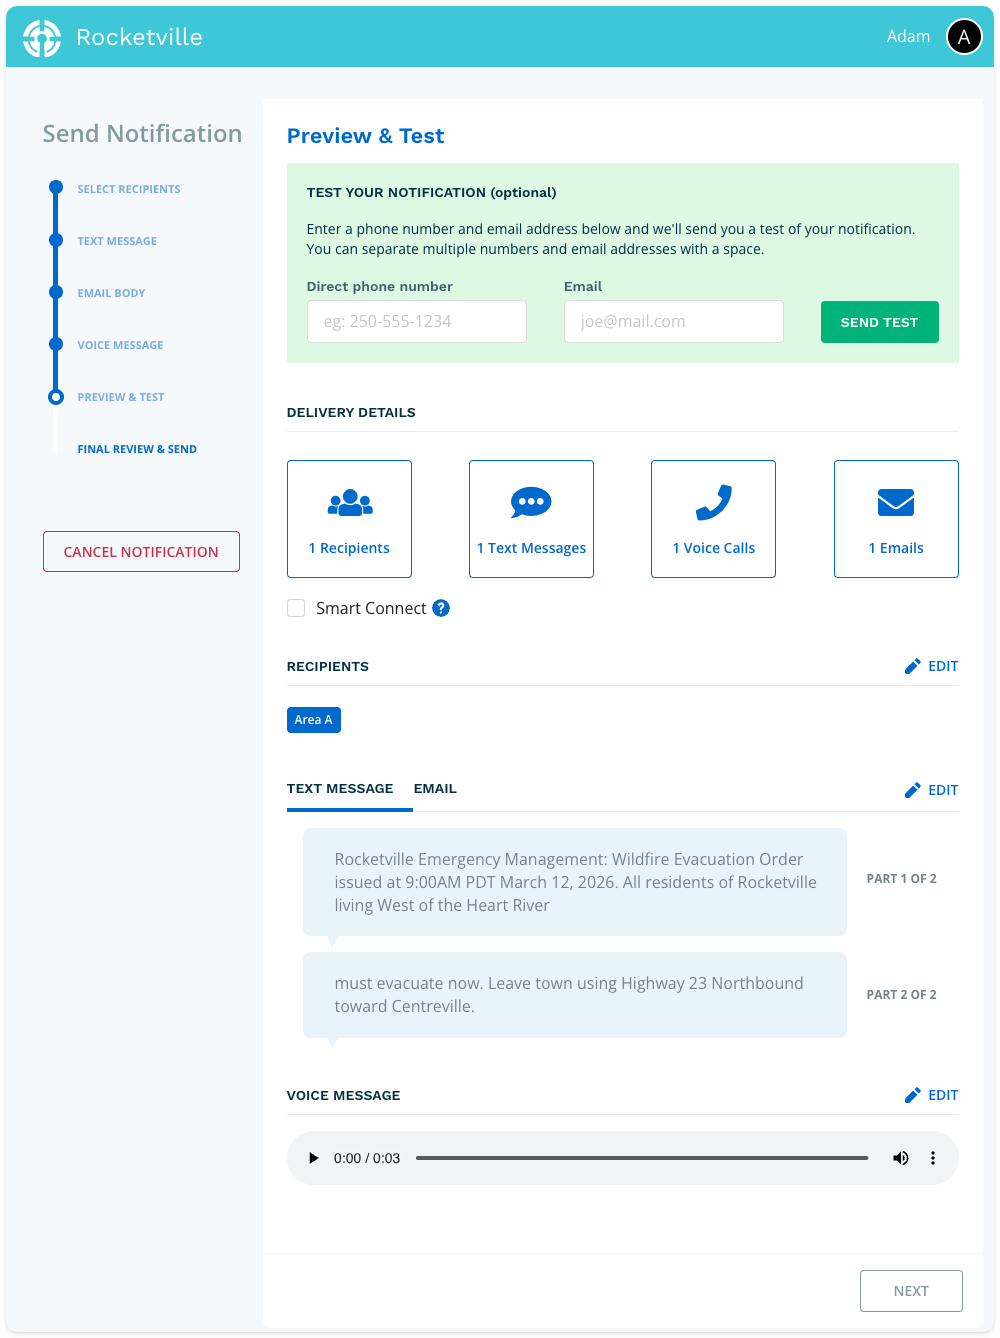
About Smart Connect: When enabled, Smart Connect sends text messages only to mobile numbers, while landlines receive voice calls. This reduces costs for non-life-safety notifications and minimizes network load—particularly useful if local telecommunications infrastructure is compromised after a disaster.
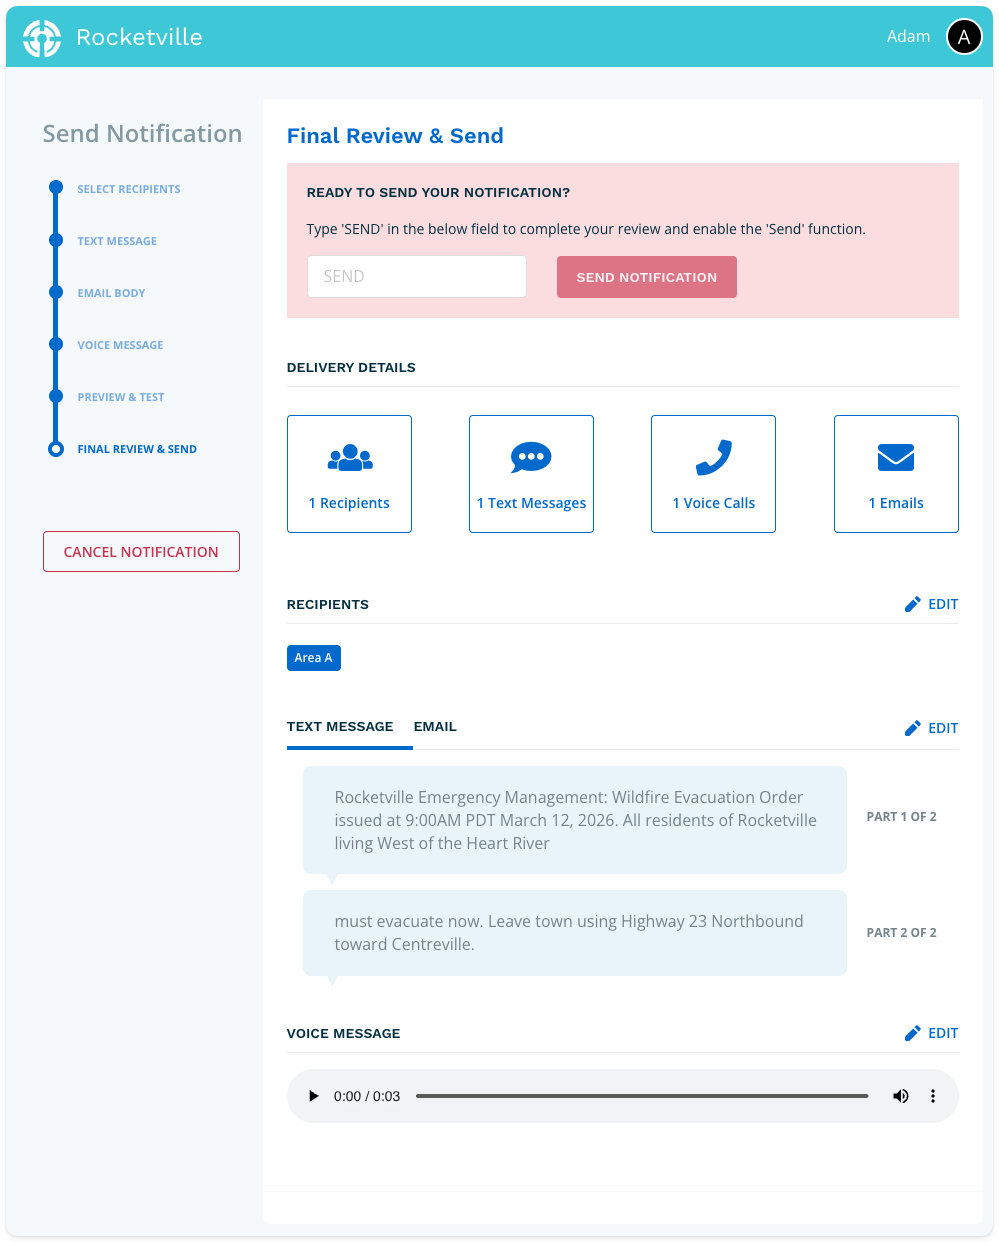
Step 7: Final Review and Send
The Final Review page provides one last opportunity to verify your notification. When everything is correct, type SEND in the confirmation field to enable the send function. Click Send Notification to deliver your message to all selected recipients.