Cascade Connect Line Configuration
A Cascade Connect Line routes inbound calls to contacts in a specified order, calling each one in sequence until a connection is made. If no contact answers, the caller is prompted to leave a voicemail, which triggers your call flow to escalate the message to your team.
Need help with phone line configuration? Book a training session and we'll be happy to assist.
Step 1
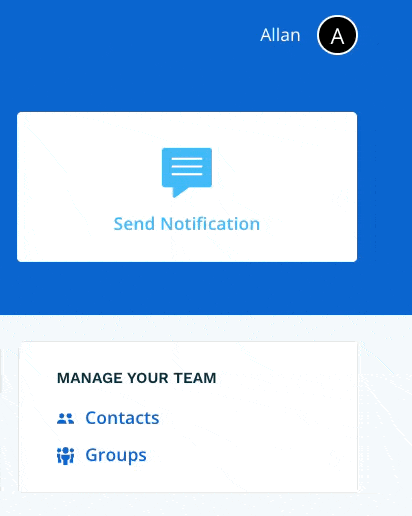
Navigate to Manage Account via the profile menu.
Step 2
Select Phone Lines from the left-hand navigation.

Step 3
Select the phone number you want to configure. Your account may have one or many phone numbers.

Step 4
Select the line type. Choose Cascade Connect, then select Next.

Step 5
Enter a name for your phone line. Choose a name that will make sense to all users who interact with it. You can optionally add a description. When done, select Next.
If you're editing an existing phone line, update the name and description as needed.

Step 6
All configuration for this article is completed under the Primary Call Flow tab. To learn about Alternate Call Flows and Schedules, see [What are Primary and Alternate Call Flows?].
The greeting is what callers hear when they call your phone number and are placed in a hold queue while Connect Rocket works through your call list.
To set a custom greeting, choose one of the following methods:
- Text-to-Voice — type your greeting as text. Connect Rocket will convert it to speech and let you preview it before saving.
- Record a Greeting — provide a direct phone number where you can be reached. Connect Rocket will call you and guide you through recording, previewing, and saving your greeting.
- Upload an Audio File — upload a pre-recorded audio file.

Once your greeting is set, select the play icon to confirm the correct greeting is in place.

Step 7
Configure the order in which Connect Rocket will attempt to reach contacts when a call comes in.
Drag contacts into the call list and arrange them from top to bottom in the order you want them to be called. Connect Rocket will work through the list sequentially — calling the first contact, waiting for the defined duration, then moving to the next if there is no answer.
Set the Call Attempt Duration — the number of seconds Connect Rocket will wait for each contact to answer before moving to the next contact on the list.
When done, select Save.
A few things to note:
- Contacts marked as Off Duty will not be called when a call is received.
- A contact can be added to the call list more than once — useful if you want to retry a key contact after working through others.

Step 8
If Connect Rocket reaches the end of the call list without a connection being made, the caller will be prompted to leave a voice message. Record the Missed Call Recording Prompt using the same options as Step 6.
Consider prompting the caller with clear expectations — for example: "We're sorry, all staff are currently unavailable. Please leave a message and a member of our team will follow up within 15 minutes."

Step 9
When a caller leaves a voicemail, Connect Rocket activates your call flow to escalate the message to your team. Select one or more action types below.
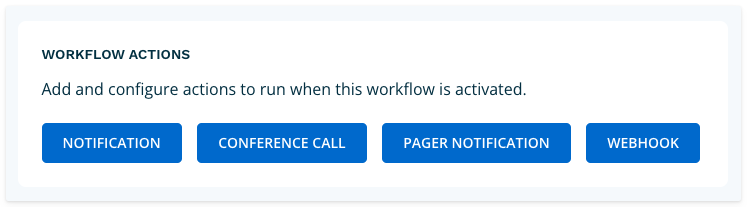
Adding a Notification
Sends a message to one or more groups when the call flow is activated.
- Recipients — select the group or groups you want to notify.
- Include Off Duty contacts — tick this checkbox to send the notification to contacts who are currently marked as Off Duty.
- Message — type your notification message. URLs are supported.
- Add an Attachment (optional) — attach a file to your notification. Any file format is supported. The file will be uploaded and a shortened URL will be appended to your message automatically.
- Add Craig Prompts (optional) — select a configured Craig Prompt to run when the call flow is activated. The Prompt results will be appended to your notification message.
- Add a Poll (optional) — select a Poll from the dropdown. If no polls are listed, you'll need to create one first. See [Polls].
- Poll Duration — set how long the Poll will remain open and collect responses. The default duration set when the Poll was created will be shown — you can adjust it for this specific call flow.
- Include voice message recording (optional) — include a link to the caller's voice message so notification recipients can listen to it directly.
- Include voice message transcript (optional) — include a text transcript of the caller's voice message. Note that transcript quality can vary depending on call quality and background noise.
- Delivery Method — select one or more delivery methods. The options available will depend on how your account is configured.
Push Message will be delivered via the Connect Rocket mobile app where installed. If the recipient does not have the app installed, or if the push message cannot be delivered, a text message will be sent automatically.
- Notification Resend (optional) — resend the notification to contacts who have not yet responded to a poll after a set period of time. Select the link to configure resend options. See [Configure a Notification Resend].
Select Save when done.

Adding a Conference Call
Initiates a conference call to one or more groups when the call flow is activated.
- Recipients — select the group or groups you want to call.
- Include Off Duty contacts — tick this checkbox to include contacts who are currently marked as Off Duty.
- Retry if unanswered (optional) — if no one answers within 2 minutes, Connect Rocket can retry the call including Off Duty contacts.
- Conference Introduction (optional) — enter text to be spoken to each recipient when they join the call. This gives call recipients immediate context for the nature of the call.
- Play voice message on answer (optional) — play the caller's voicemail to call recipients when they join the conference call, so they can hear the original message firsthand.
- Conference Phone Number — select the phone number the conference call should be initiated from.
Select Save when done.
You can add one Conference Call per call flow.

Adding a Pager Notification
Sends a page to one or more groups when the call flow is activated.
- Recipients — select the group or groups you want to page.
- Include Off Duty contacts — tick this checkbox to include contacts who are currently marked as Off Duty.
- Pager Message — enter your page message. Valid characters are: digits (0–9), # and *. Use 'w' to insert a half-second pause.
Select Save when done.
Legacy pager technology can sometimes be difficult to trigger. Contact support if you're having trouble activating numeric, alphanumeric, or voice pagers.

Adding a Webhook
Sends data to an external system when the call flow is activated.
- Request Method — select POST or GET.
- URL — enter the endpoint URL. Must be HTTPS and publicly resolvable.
- Authorization Header (optional) — add a Bearer token or other authorization header if required by the receiving system.
- Request Body (JSON) — enter your request body using valid JSON. The following string interpolation fields are available:
{{workflow_name}}— the name of this call flow.{{activation_uuid}}— the unique identifier for this activation.{{recording_url}}— a URL to the voice recording, if available.{{inbound_message}}— the inbound text message, if available.{{craig_prompt_output}}— the output of a Craig Prompt, if one is added below.
- Craig Prompts (optional) — select a configured Craig Prompt. The output will be available as
{{craig_prompt_output}}in your request body.
Select Save when done. You can test your Webhook configuration after saving.

Step 10
Once you have added all of your actions, your Cascade Connect Line is configured. From the Phone Lines page you will see your phone line name and line type. To edit the phone line or call flow, select the pencil icon.

Test your configured call flow to confirm it performs all expected actions before putting it into operational use.