Using Locate & Message
This article walks you through sending a Locate request, reviewing the results, and messaging with a subject. For setup instructions, see Configuring Locate & Message. For requirements and best practices, see Locate & Message: Requirements and Best Practices.
Step 1
From the Dashboard, select the Locate & Message tab.

Step 2
Enter the subject or bystander's 10-digit phone number, along with a name or other identifier — such as a task number. Select Locate to send the request by text message.

Step 3
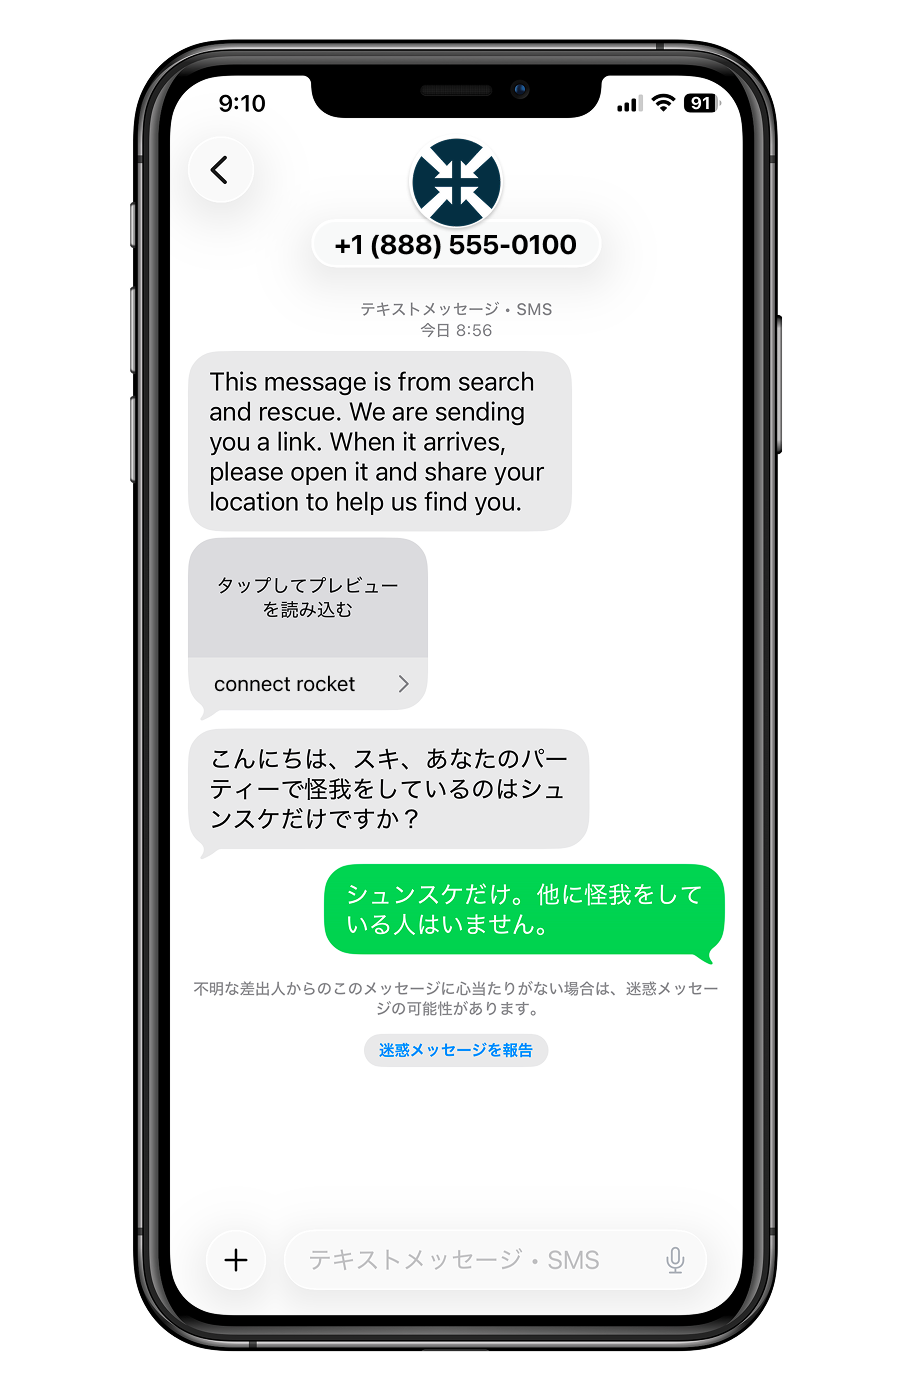
When the subject receives the text message, they tap the link and allow their phone to share its location. Their phone then sends location coordinates back to Connect Rocket.
For privacy reasons, Connect Rocket only retrieves location data from a subject's device for 120 seconds. During this window, several further requests are made at set intervals to refine the subject's location as their device's GPS gets a better fix.

Step 4
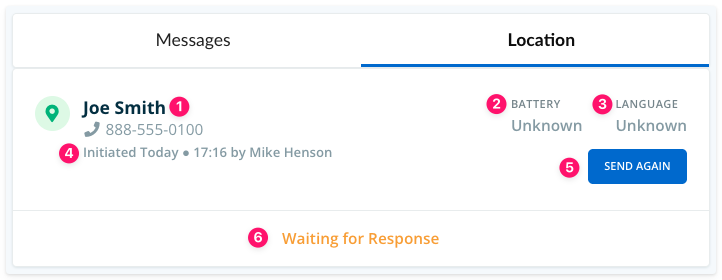
Locate requests appear in the Location tab, with active requests listed at the top. Before the subject has responded, you'll see:
- The name and mobile number used to initiate the request.
- Battery level — shown as unknown until the subject shares their location. Android devices report battery level automatically; iOS users are prompted to enter it manually.
- Preferred language — shown as unknown until the subject shares their location.
- The time the Locate request was initiated, and by whom.
- If you need to confirm a subject's location or send a follow-up request later, select Send Again.
- Status — initially shows as "Waiting for Response." Once the subject responds, this updates to show location coordinates.
If the subject's device does not have location services enabled, Connect Rocket will be unable to obtain their location. You will be notified if this is the case, and the subject will automatically receive instructions on how to enable location services on their device.
Step 5
Once the subject has shared their location, the Location tab updates with additional detail and options:
- In ideal conditions, up to 6 sets of coordinates are obtained over the 120-second window, each with a margin of error shown in metres.
- Select View Map to see the location coordinates plotted on a map.
- Select Share Coordinates by Notification to forward the coordinates, in your account's default format, to one or more Groups.
- Select Download Coordinates as KML File to obtain a .kml file of the coordinates, which can be imported into mapping tools or shared with third parties.
- Select Copy Public Link to Map to copy a URL to a map showing the location. This link can be pasted into any external communication tool — text message, email, or otherwise.
- To view coordinates in a format other than your account's default, use the format selector to switch between available formats.

Step 6
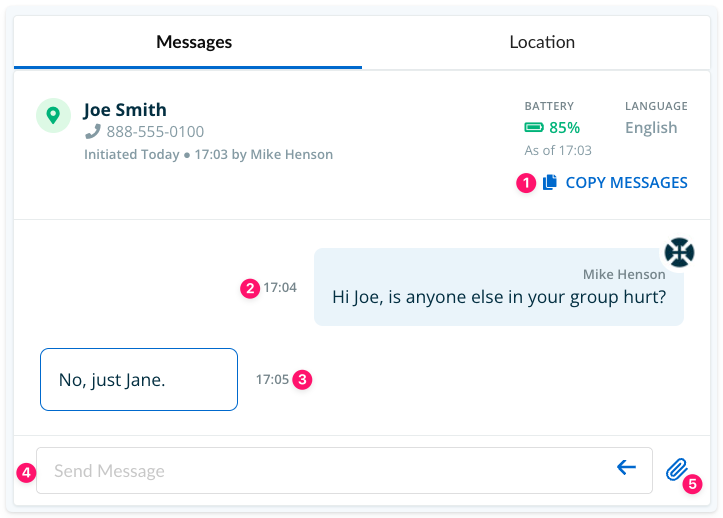
The Messages tab provides a centralized text-based conversation with the subject. In addition to text, images and files can be shared in both directions — the subject can send photos of their surroundings, an injury, or a landmark to help your team understand their situation, and you can send files or images back to them.
- Select Copy Messages to copy the full conversation for pasting into another application.
- Messages from the Connect Rocket user appear on the right, with sender name and timestamp.
- Messages from the subject appear on the left, with timestamp.
- The message composition field is available to Dispatch-level users and above.
- Select the paperclip icon to attach a file.
If your account has Locate & Message Translation enabled, messages in this tab are automatically translated for both sides of the conversation. For the Connect Rocket user, you'll see the text message in your preferred language, with the translated value underneath - in this example English and Japanese.
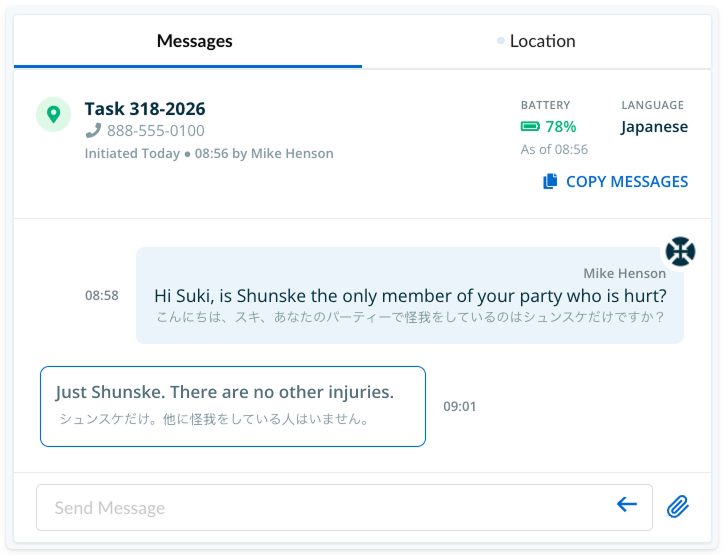
Once preferred language has been determined the subject will see messages only in their preferred language.
For guidance on best practices and what to expect from the Locate & Message process, see Locate & Message: Requirements and Best Practices.