What does an Android user see when they receive a Locate request?
This article shows the experience from the subject or bystander's side of a Locate request on an Android device — useful if you want to know what to expect, or what to tell a subject before sending the request.
The experience is largely the same as on iOS, with one key difference: Android devices share battery level automatically, with no action required from the subject. See What does an iOS user see when they receive a Locate request? for a side-by-side comparison.
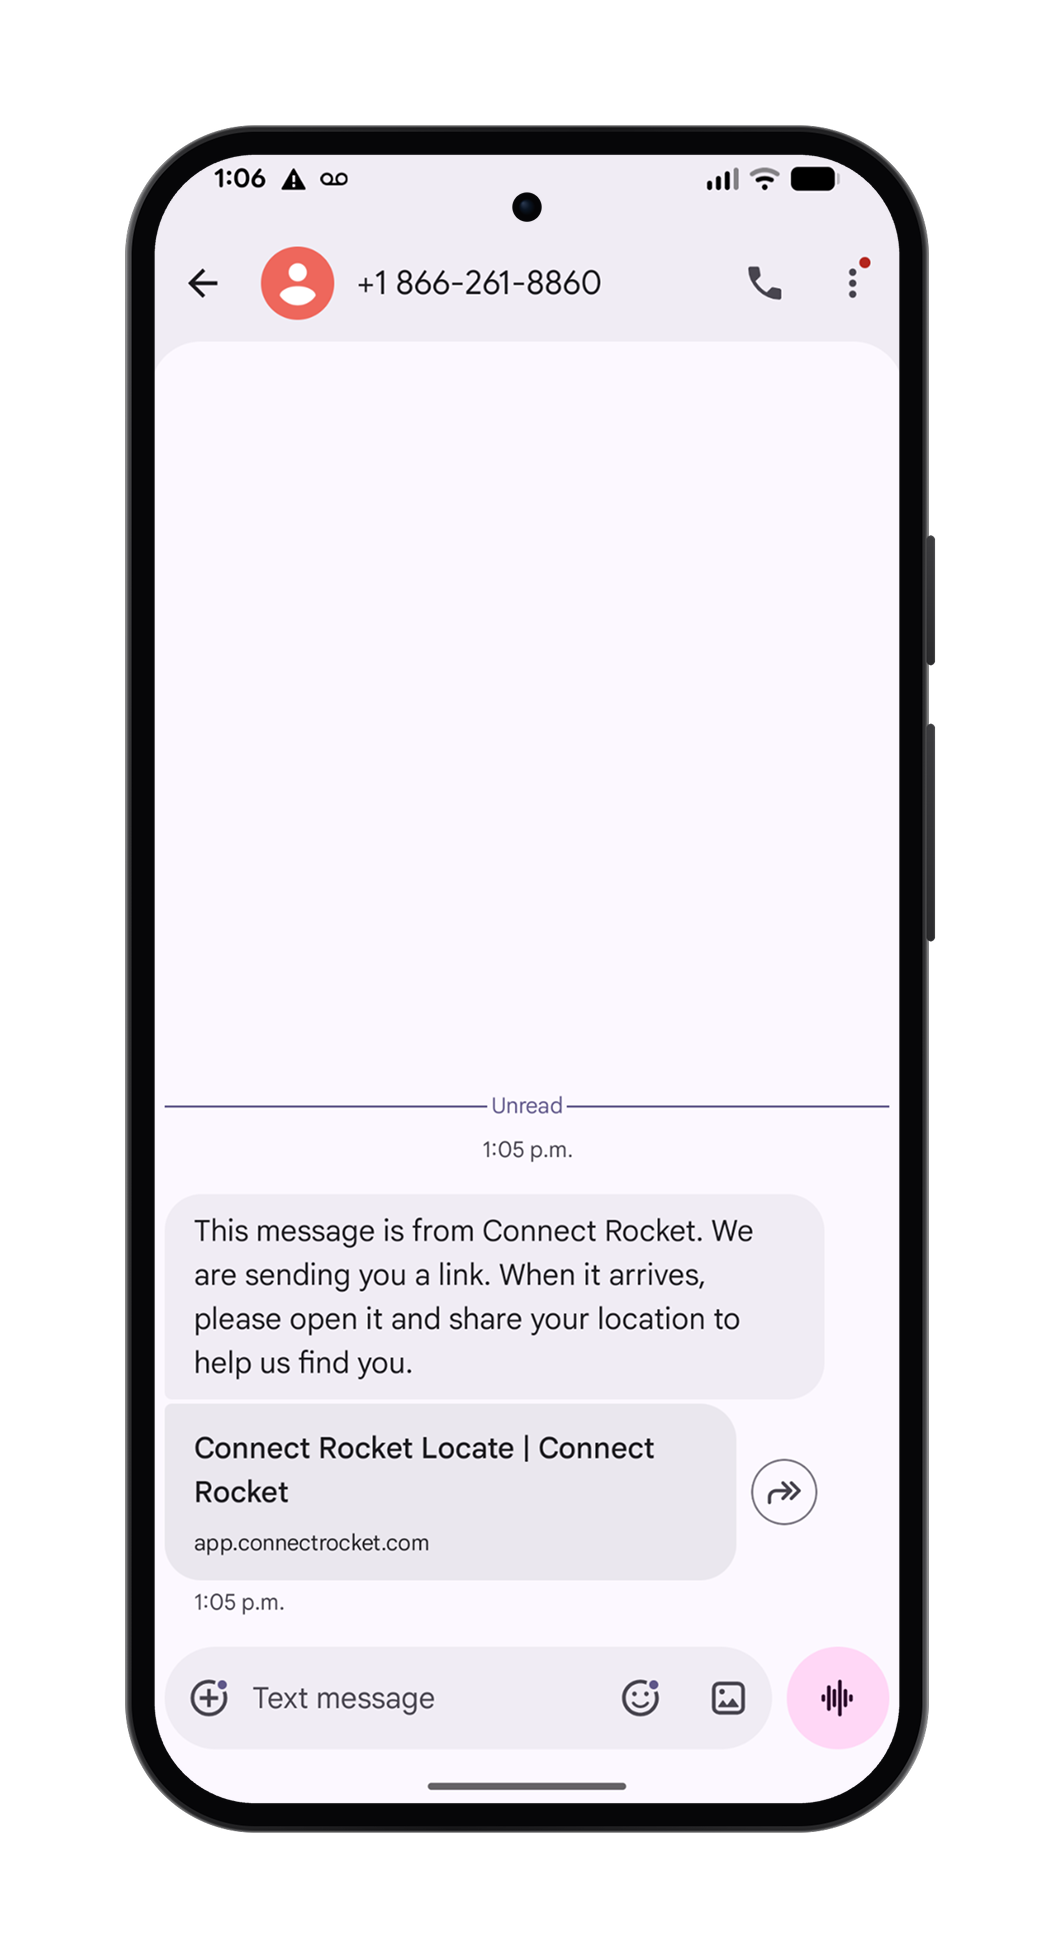
Step 1 — Receiving the text message
When a Locate request is sent, the subject first receives a text message with a link. The content of this message can be customized — see Configuring Locate & Message.
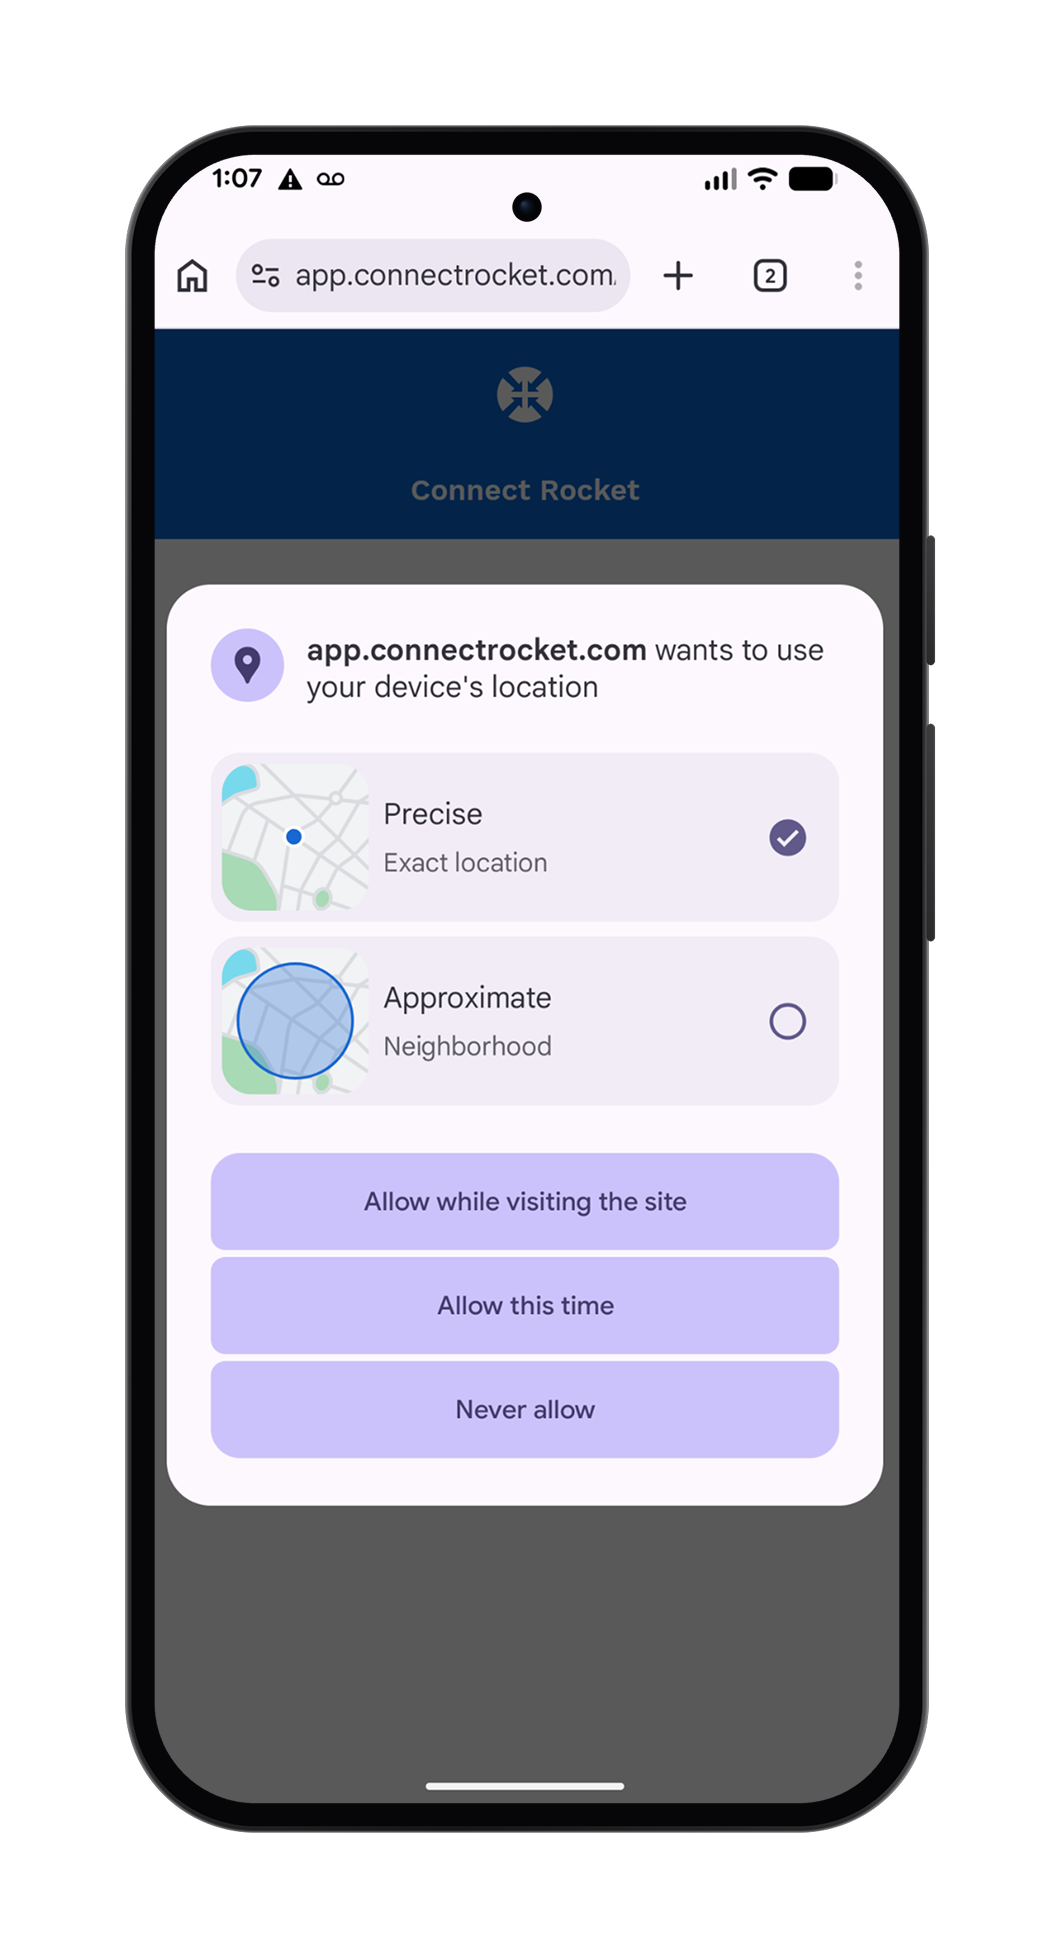
Step 2 — Sharing location
When the subject taps the link, they're taken to a webpage. Depending on their device settings, their browser may prompt them to allow location access.
If the subject is communicating in a language other than English, the entire webpage experience is automatically served in their preferred language. This feature does not require message translation to be enabled.
Android's permission prompt may offer a choice between Precise and Approximate location. For an accurate result, the subject should select Precise — Approximate location will return a much wider, less useful search area.
If the subject's device does not have location services enabled, Connect Rocket will automatically provide the subject with instructions on how to enable location services on their device.
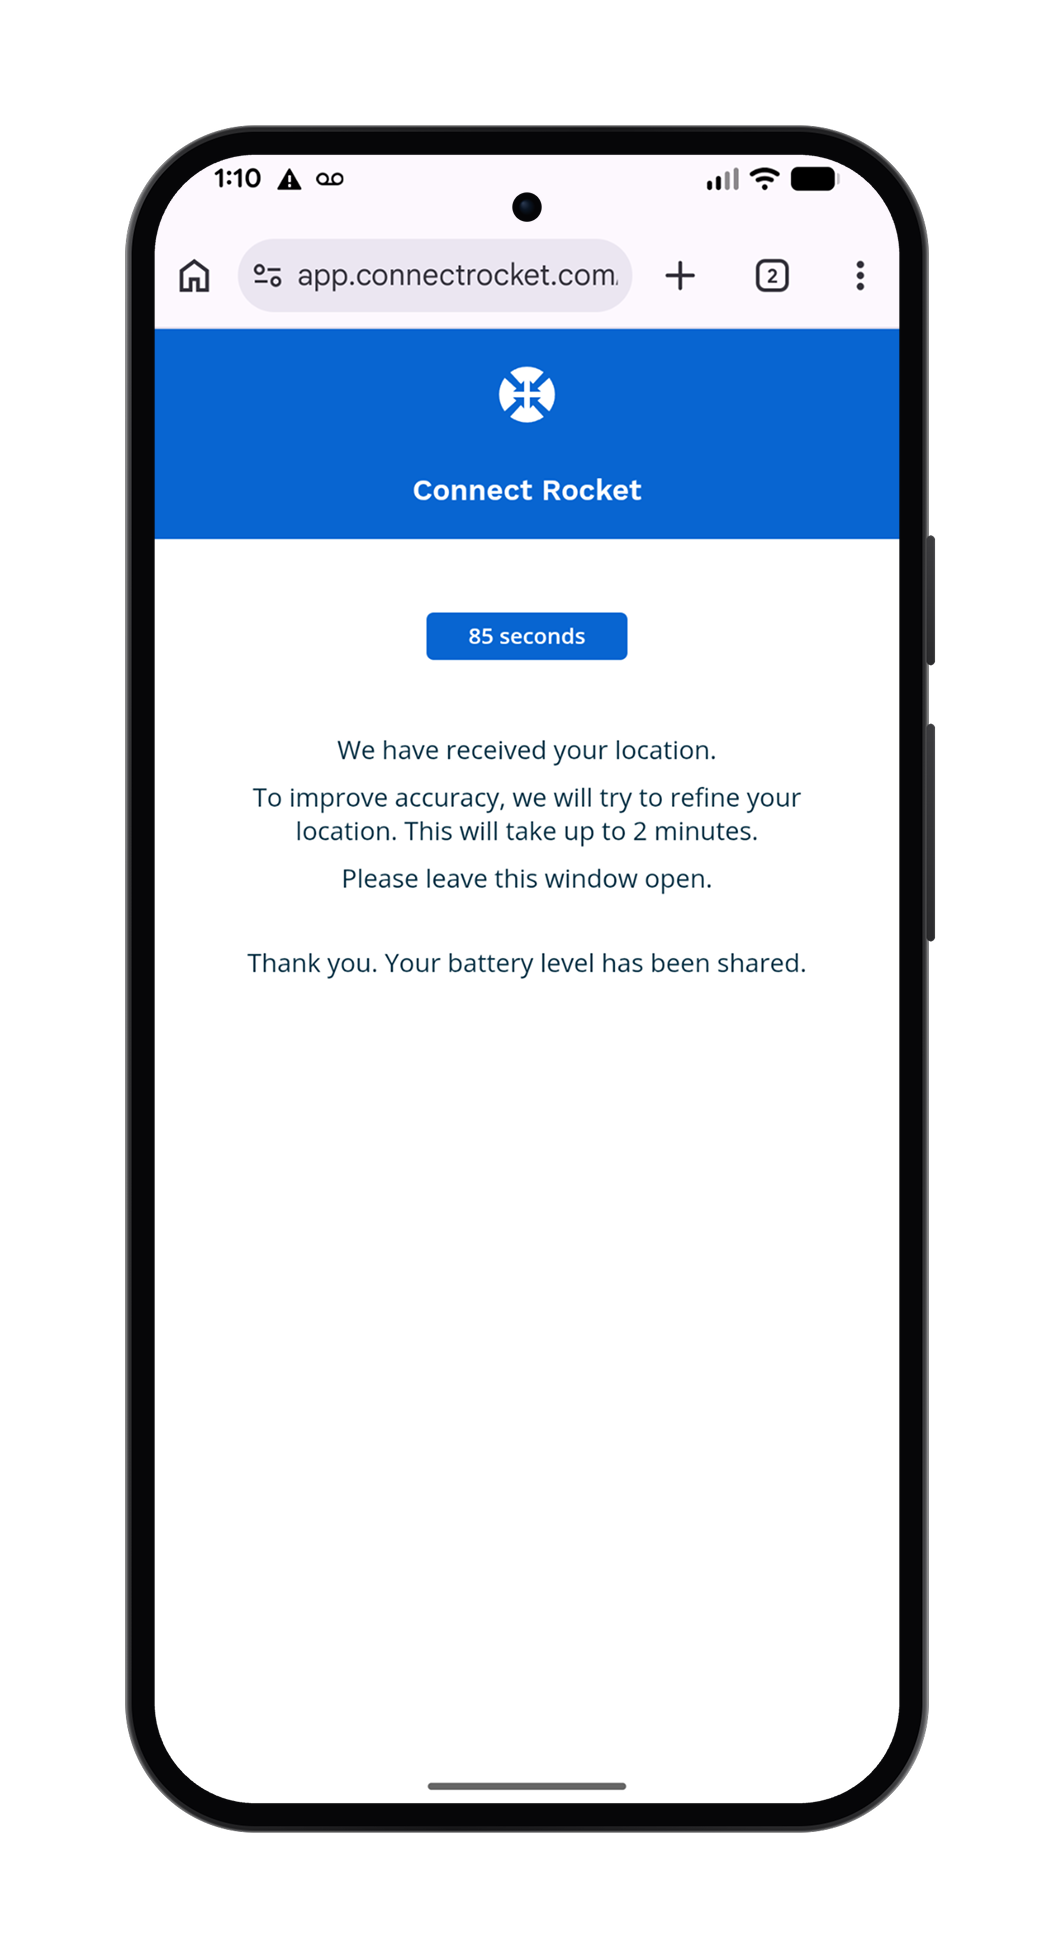
Step 3 — Refining location and sharing battery level
Once the subject allows location access, Connect Rocket obtains an initial position. A countdown timer displays while Connect Rocket works to refine the subject's GPS coordinates over the following two minutes.
On Android, battery level is shared automatically in the background — the subject is not prompted and does not need to take any action.
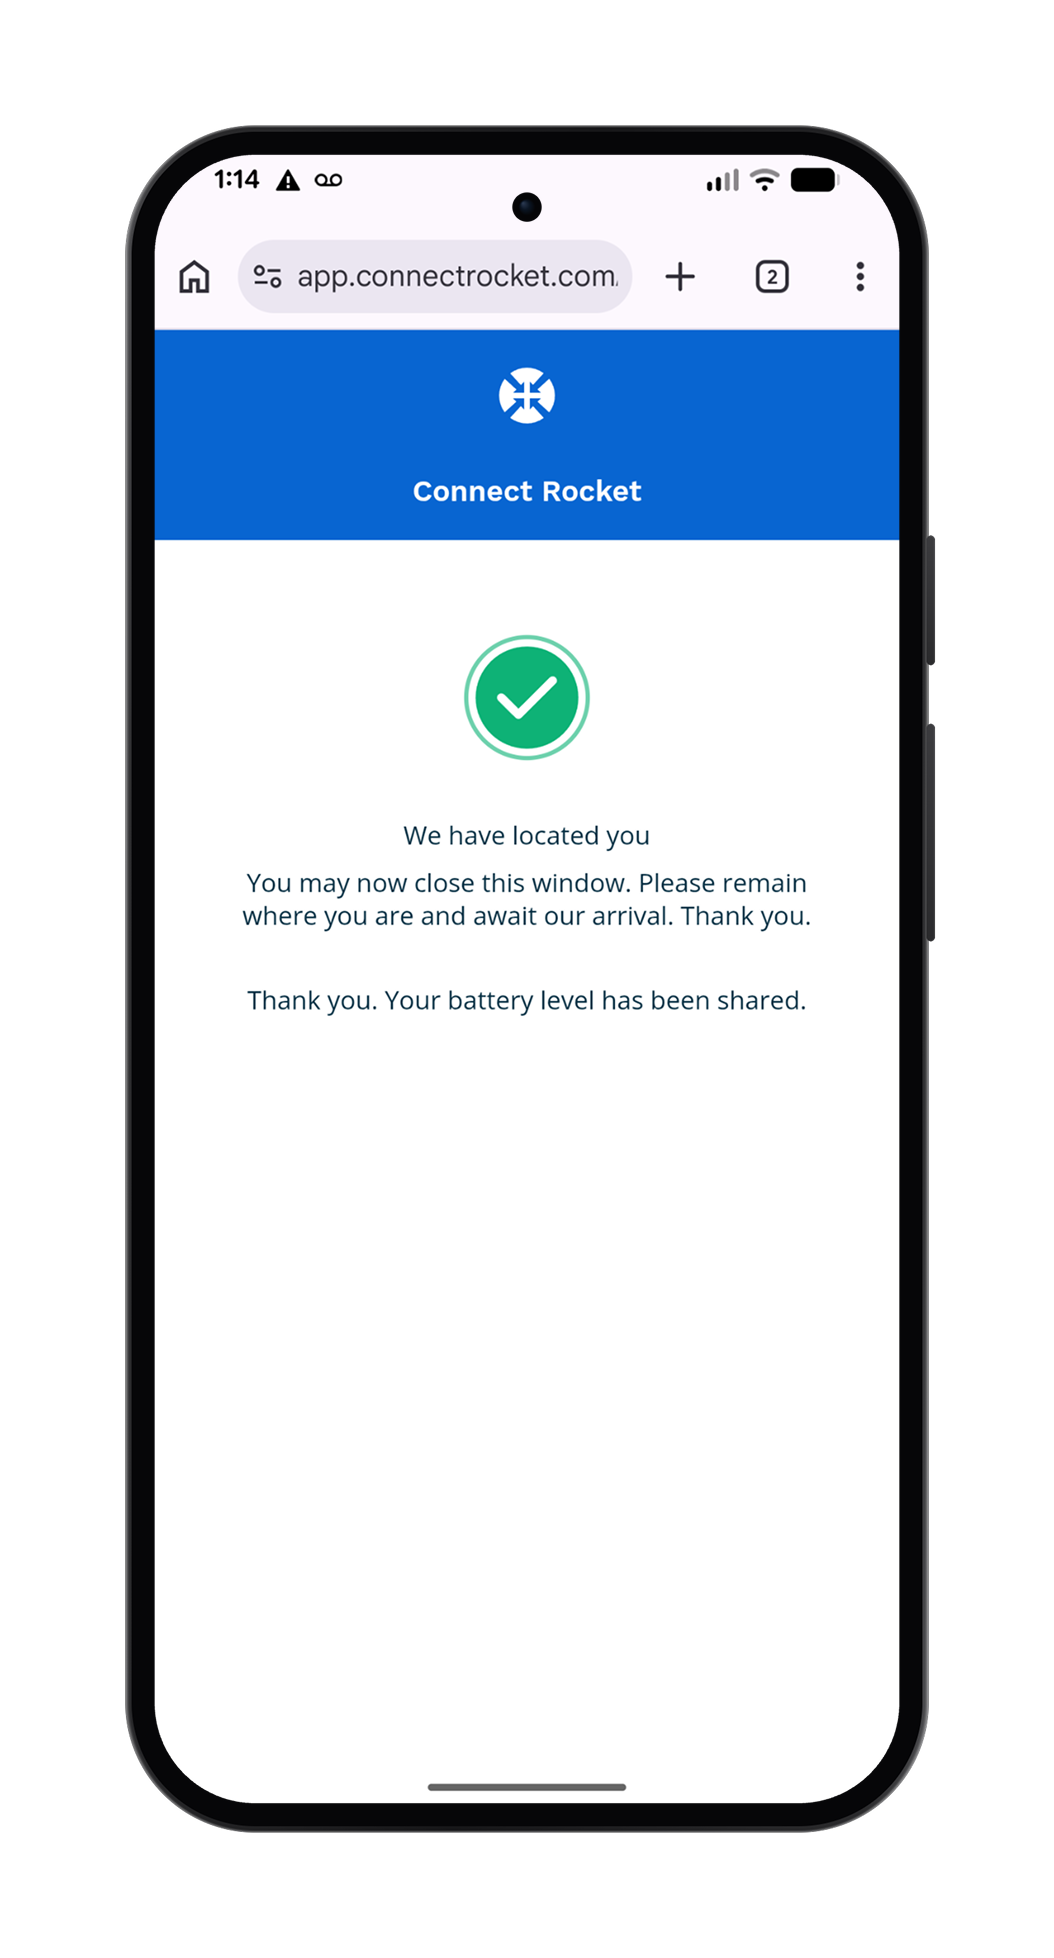
Step 4 — Completion
Once the Locate request is finalized, a confirmation message displays. This message can also be customized — see Configuring Locate & Message — and is a good place to provide next steps or reassurance to the subject.