
Configuring Agents
Administrator access is required to configure Agents.
Step 1
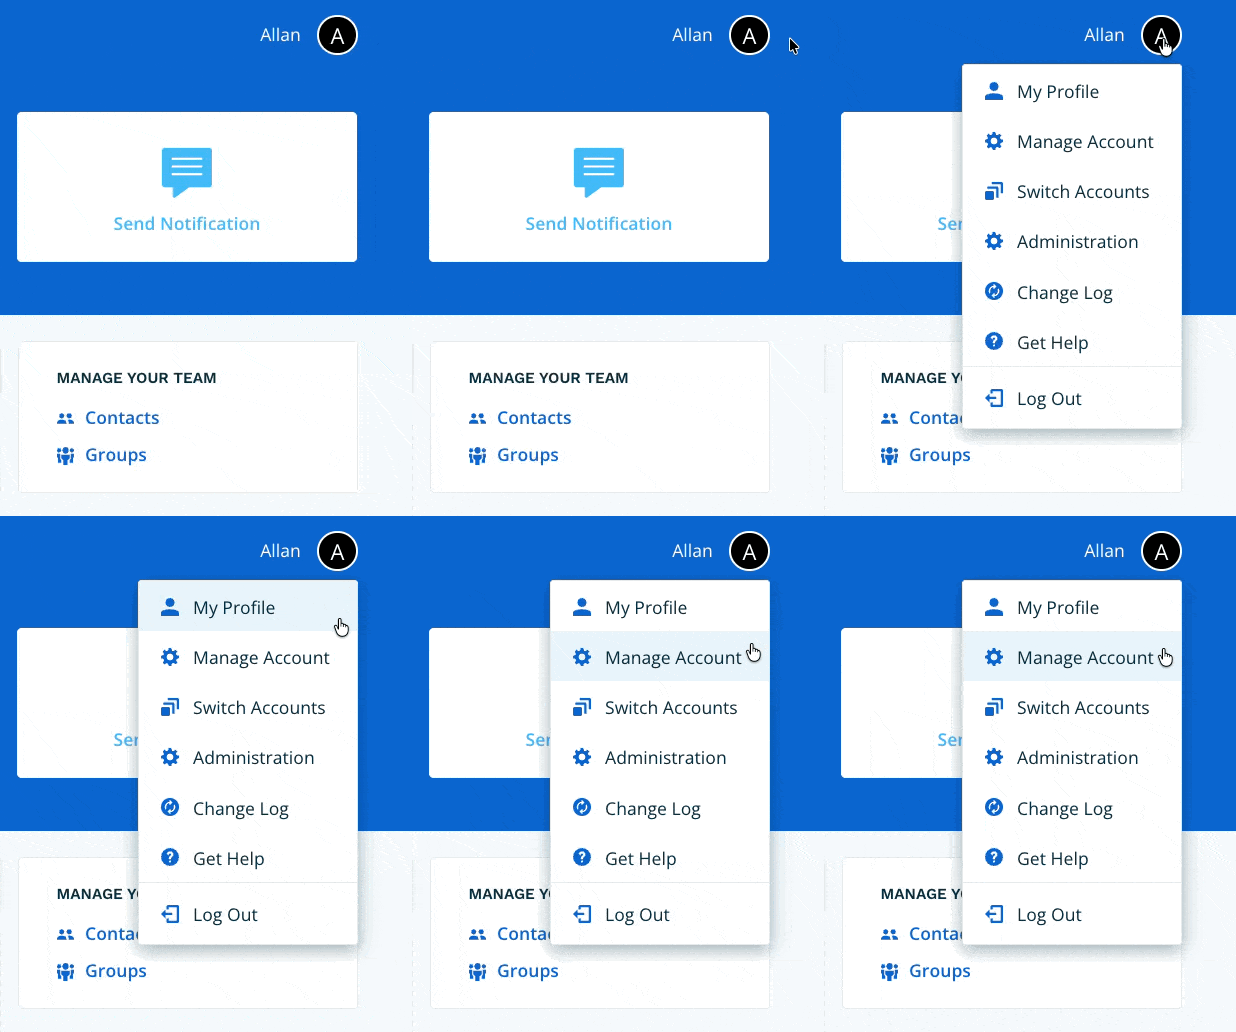
Navigate to Manage Account via the profile menu.
Step 2
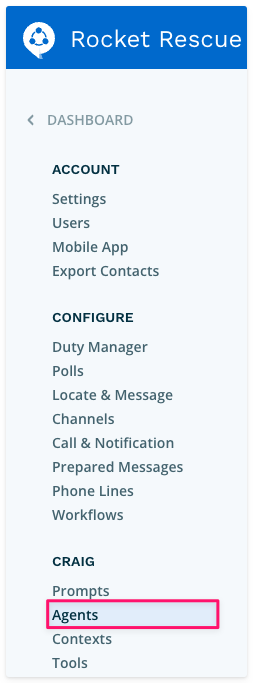
Select Agents from the left-hand navigation.
Step 3
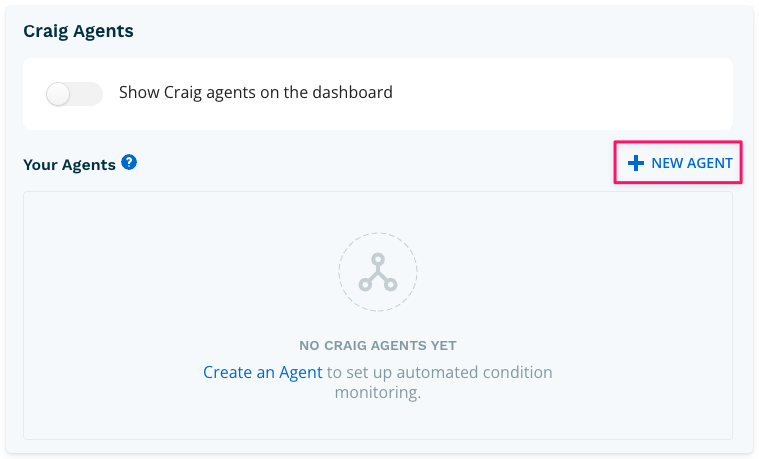
Select + New Agent. You can create as many Agents as your organization needs.
Step 4 - Configuring your Agent
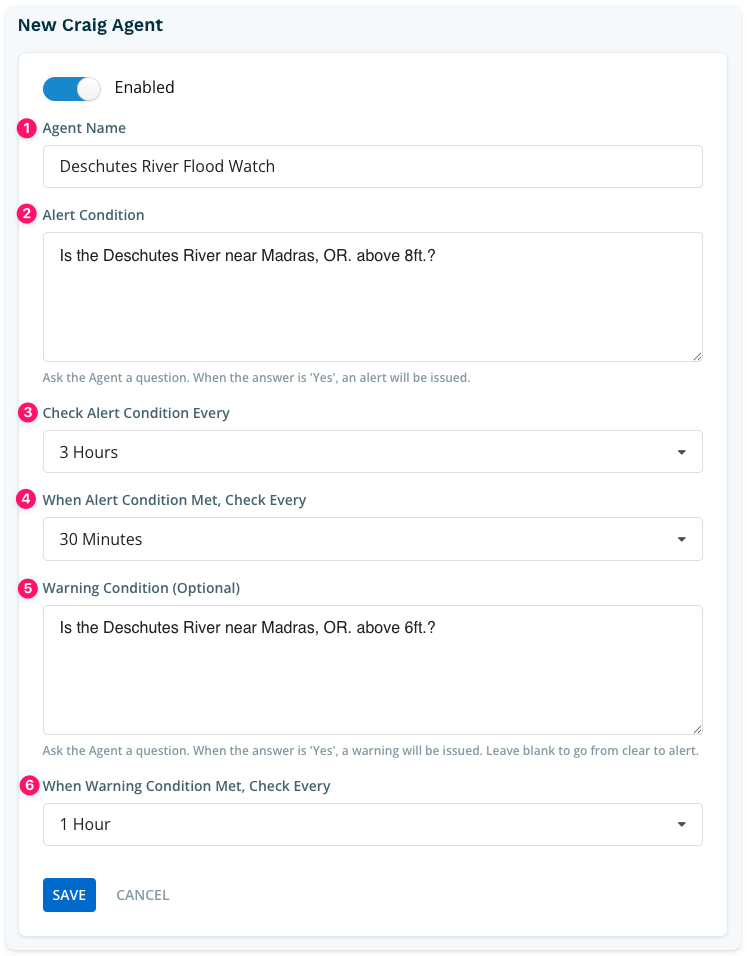
Complete the following fields:
- Agent Name — Give your Agent a clear, descriptive name that reflects what it monitors. You'll see this name in your Agent list, so make it easy to identify at a glance.
- Alert Condition — Write a plain-language question that Craig will answer yes or no each time it checks. For example: Is the flow rate at the Deschutes River at Madras, OR above 6 feet?
- Check Alert Condition Every — Set how often Craig should check the Alert Condition while the Agent is in the Clear state.
- When Alert Condition Met, Check Every — Set how often Craig should re-check the Alert Condition once the Agent has moved into the Alert state.
- Warning Condition (optional) — Write a plain-language question for an earlier, lower-threshold condition. Craig will answer yes or no each time it checks. Leave this blank if you want the Agent to move directly from Clear to Alert.
- When Warning Condition Met, Check Every — Set how often Craig should check while the Agent is in the Warning state.
Tip: For best results, reference the exact field names the tool returns when writing your conditions and notification messages. Referencing specific field names rather than describing what you want in general terms gives Craig greater precision and produces more reliable results. You can find the fields available for each tool by expanding it in the Tools index.
Understanding Agent states
Agents move through different states depending on the conditions you've configured:
- Clear — No conditions have been met. The Agent is monitoring at the standard check interval.
- Warning — The Warning Condition has been met. The Agent increases its check frequency and can trigger a separate action to notify your team of an emerging situation.
- Alert — The Alert Condition has been met. The Agent triggers your Alert action and continues checking at the alert interval for as long as the condition persists.
- Condition Cleared — The Agent has returned to a Clear state from Warning or Alert. A separate action can be configured to notify your team when conditions improve.
Step 5 - Configure Agent Actions
Actions determine what Craig does when each state is reached. You can configure up to four actions — one for each state transition:
- Warning Condition Met — Triggered when the Agent moves from Clear to Warning for the first time.
- Alert Condition Met — Triggered when the Agent moves from Clear or Warning to Alert for the first time.
- Alert Condition Ongoing — Triggered on a recurring basis while the Agent remains in the Alert state.
- Condition Cleared — Triggered when the Agent returns to a Clear state from Warning or Alert.
At least one action must be configured before your Agent becomes active.
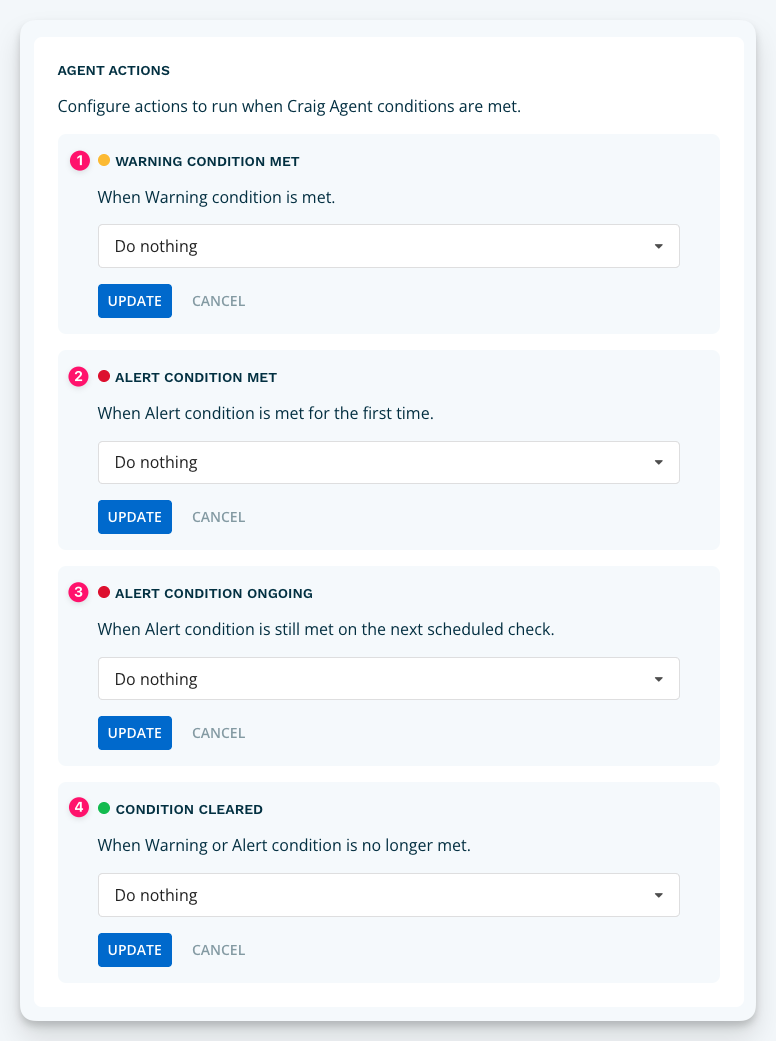
For each action, select the block for the state you want to configure, then choose from the available options:
Option 1 - Sending a Notification
- Select the group or groups you want to notify.
- Enter the message you want Craig to send. You can use double square brackets as placeholders for values that will be filled in when the Agent runs — for example,
[[location]]or[[flow rate]]. For a full list of fields you can reference, Tools in the Manage Account area. - Select one or more delivery methods. The options available will depend on how your account is configured.
Select Update. The Workflow will be activated if and when the condition is met.
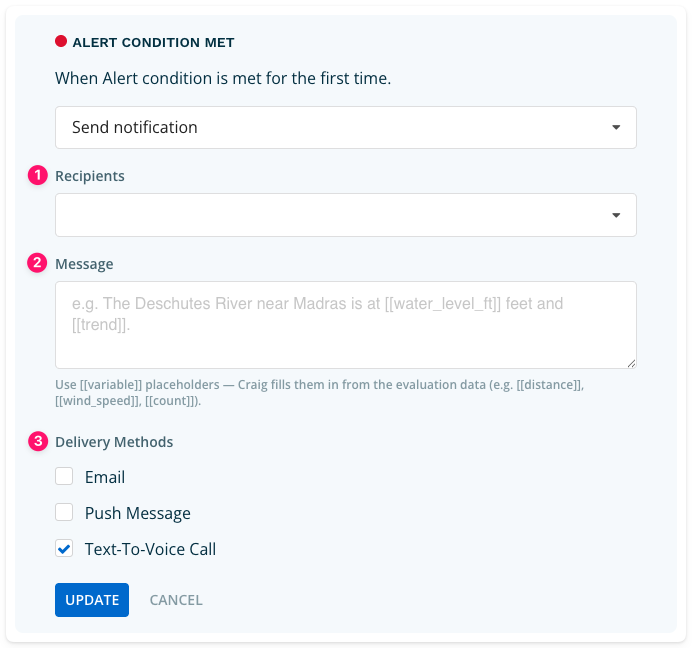
Option 2 - Activating a Workflow
- Select from your available Workflows.
Select Update. The Workflow will be activated if and when the condition is met.
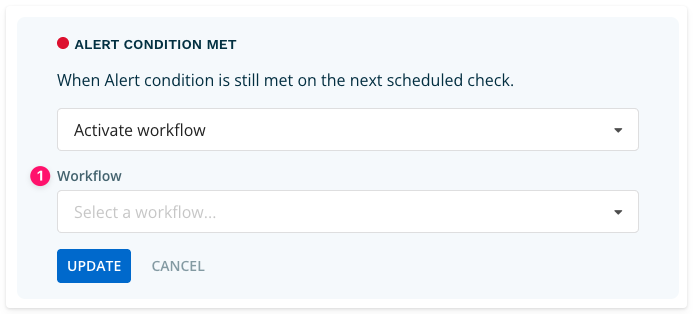
Not sure whether to send a Notification or activate a Workflow?
Use Send a Notification when you need to send a single message to selected contacts.
Use Activate a Workflow when you want to trigger a more involved communications process — for example, a multi-step notification sequence, a conference call bridge, or a Duty Manager activation.