
Using Locate & Message – Messages Prioritized
This article walks you through exchanging messages with a subject and, when you need it, obtaining their location. It covers accounts that start sessions Message first. If your account starts sessions Locate first, which is the default, see Using Locate & Message – Locate Prioritized. You need an Administrator or Dispatcher account, and Locate & Message must be turned on. For setup instructions, see Configuring Locate & Message. For requirements and best practices, see Locate & Message: Requirements and Best Practices.
Step 1
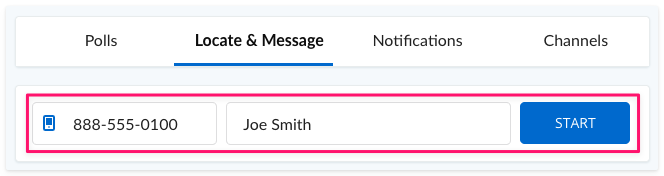
From the Dashboard, select the Locate & Message tab.

Step 2
Enter the subject's 10-digit phone number. For numbers outside North America, see Using Locate with international numbers. You can also add a name or other identifier, such as a task number. This is optional. If you leave it blank, the phone number identifies the session.
Select Start to open the conversation with the subject.
Step 3
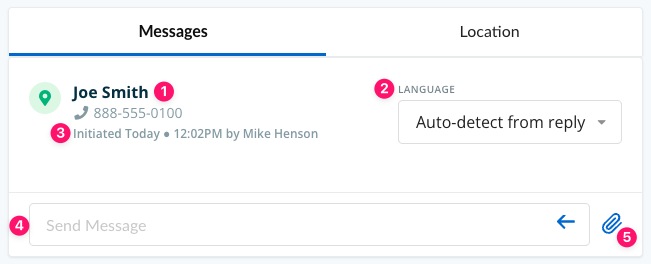
The Messages tab shows your text conversation with the subject. You can share images and files in both directions. The subject can send photos of their surroundings, an injury, or a landmark to help your team understand their situation, and you can send files or images back. Before you send your first message, you'll see:
- The name (if you entered one) and mobile number used to start the session.
- Language — set to Auto-detect from reply by default. If you know the subject's language, use the menu to set it before you send your first message. Requires translation to be turned on.
- The time the session was started, and who started it.
- Type your message in the Send Message box. It is available to Administrators and Dispatchers.
- Select the paperclip icon to attach a file.
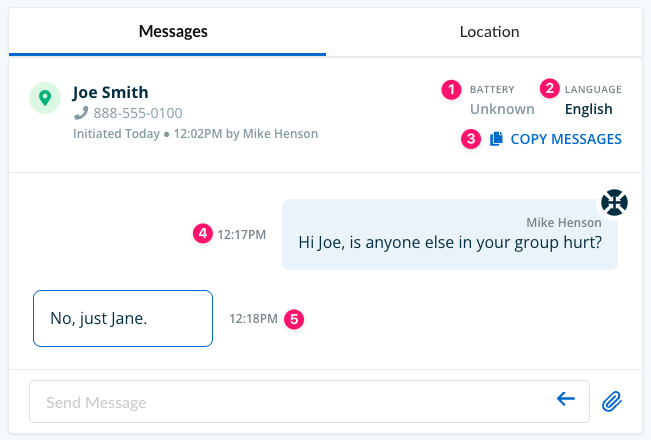
After you send your first message and the subject replies, the conversation shows more details:
- Battery — unknown until the subject shares their location. Android phones report battery level automatically. iPhone users are prompted to provide it.
- Language — shows the language you set. If you left it on Auto-detect from reply, it updates to the language detected from the subject's reply. Once the language is set, Connect Rocket uses it for the rest of the conversation.
- Select Copy Messages to copy the full conversation so you can paste it into another application.
- Your messages appear on the right, with your name and a timestamp.
- The subject's messages appear on the left, with a timestamp.
If translation is turned on for your account, messages are translated automatically for both sides of the conversation. You see every message in your own language, with the other language underneath. For your messages, that's the translation. For the subject's messages, it's the original. In this example, the languages are English and Japanese.
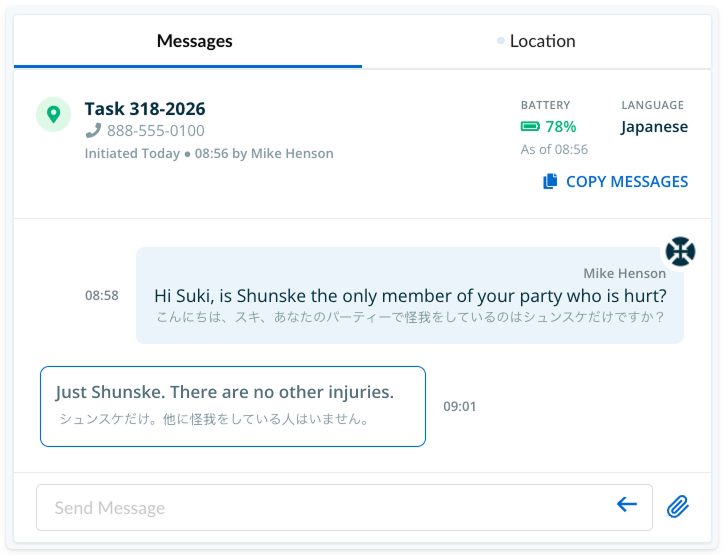
The subject sees your messages in their language. If you set the language before your first message, this applies from the start. If you left Auto-detect from reply on, your first message is sent as you typed it. Connect Rocket needs the subject's reply to detect their language, and later messages are translated after that.
Step 4
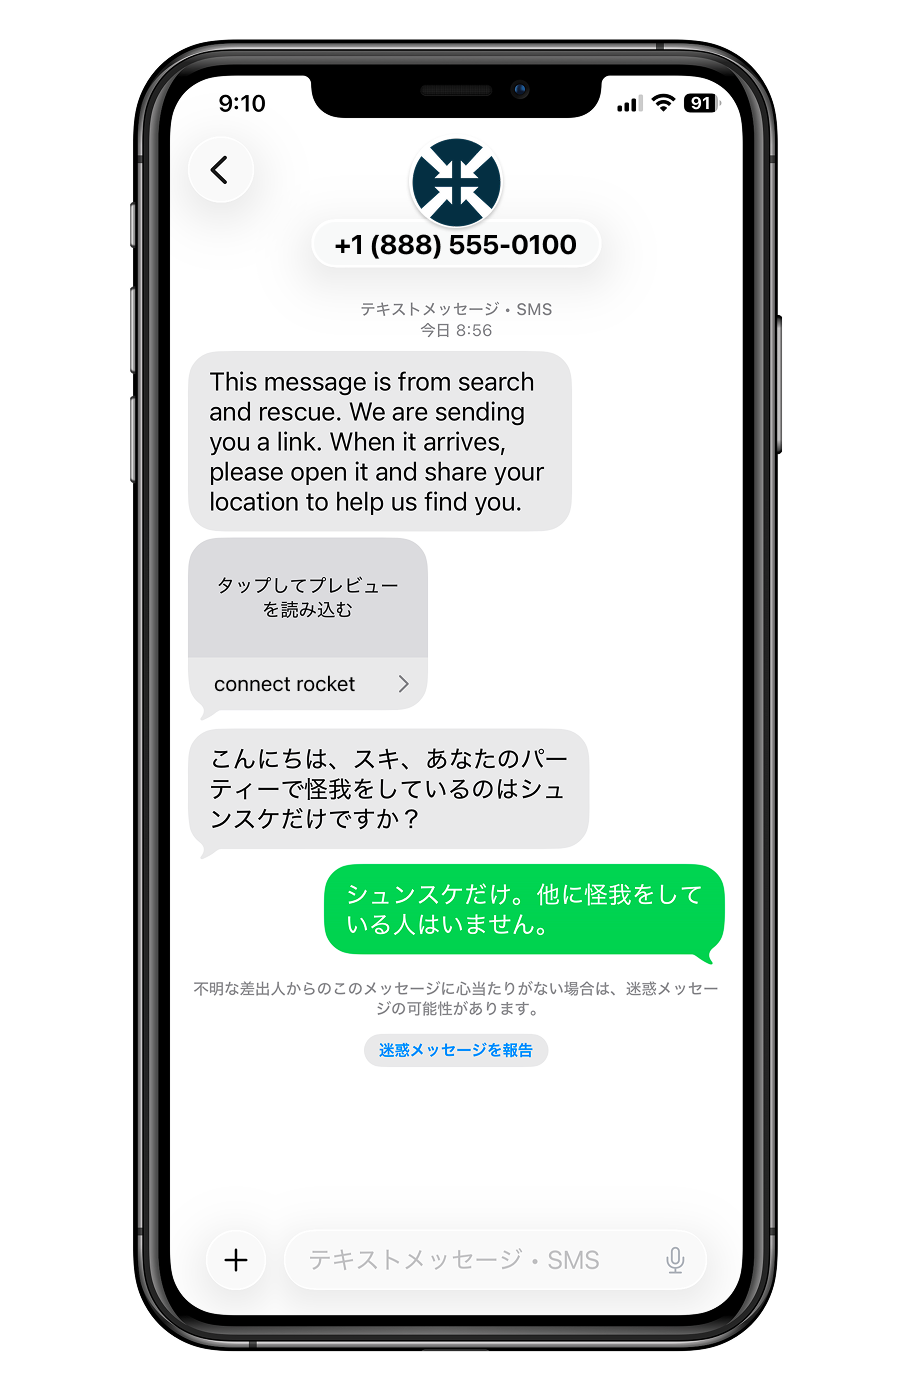
At any time, you can request the subject's location. Go to the Location tab and select Request Location. Connect Rocket sends the subject your Initiation Message and a link. Depending on their phone, the link may appear with a preview image or as a plain web address.
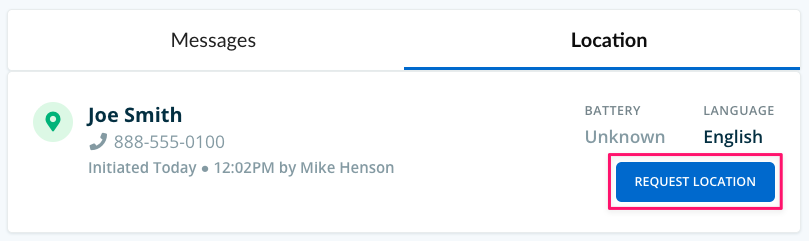
You don't have to send a message first. If you request the location before sending any message, Connect Rocket uses the language of the subject's phone for the conversation. If a language is already set, it stays the same.
If the subject's phone does not have location services turned on, Connect Rocket can't get their location. You are notified, and the subject automatically receives instructions on how to turn on location services.
Step 5
When the subject taps the Locate link in the text message, a Connect Rocket web page opens in their phone's browser. They allow their phone to share its location, and the browser sends it to Connect Rocket.
For privacy reasons, Connect Rocket only retrieves location data from a subject's phone for 120 seconds. During this time, further requests are made at set intervals to refine the location as the phone's GPS (its built-in location tracking) gets a stronger signal.

Step 6
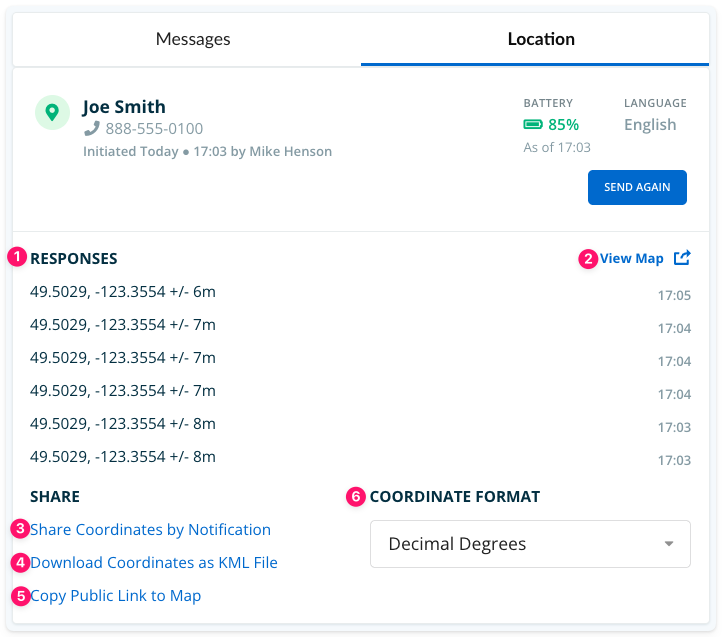
Once the subject has shared their location, the Location tab updates with more detail and options:
- In ideal conditions, up to 6 sets of coordinates are obtained over the 120-second period. Each has a margin of error (how far off the location might be) shown in meters.
- Select View Map to see the coordinates plotted on a map.
- Select Share Coordinates by Notification to forward the coordinates, in your account's default format, to one or more Groups. Your Administrator sets the default format in Location Formatter.
- Select Download Coordinates as KML File to get a .kml file, a file type many mapping tools can open. You can import it into a mapping tool or share it with others.
- Select Copy Public Link to Map to copy a web link to a map showing the location. Anyone who has the link can open the map, even if they don't use Connect Rocket. This makes it easy to share the location with partner agencies or others helping with the response. You can paste the link into any other tool, such as a text message or email.
- To see the coordinates in a different format, use Coordinate Format to switch between the available formats.
For guidance on best practices and what to expect from the Locate & Message process, see Locate & Message: Requirements and Best Practices.